To create a new calendar,
- Select Site Actions > More Options
OR
Site Actions > All Site Content > Create
- Select the Calendar list icon and click on More Options

- Enter the calendar name and description
- Select No to "Display this list on the Quick Launch" (you can add it manually if needed)
- Select No under "Use this calendar to share member's schedule" if you create an event calendar
- Click Create
Note:
If the calendar list does not appear on the Create window, this site does not have Team collaboration Lists activated.
Activating Team collaboration Lists:
- Site Actions > Site Settings
- Select Manage Site Features under Site Actions
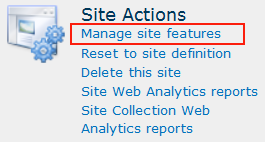
- Activate Team Collaboration Lists

Adding a new event
In All Site Content, the newly created calendar appears under the Lists header.
To add an event to the calendar:
- Click on the calendar list to open it
- Select a date on the calendar
- On the ribbon, select Calendar Tools tab, select Events and click New Event.
Other methods to create a new event: - Double click on the selected date on the calendar to open the New Item window
- Mouse over the bottom right corner of a date cell and click on + Add
- Enter Title, Location, Start Time, End Time, Description and select a Category
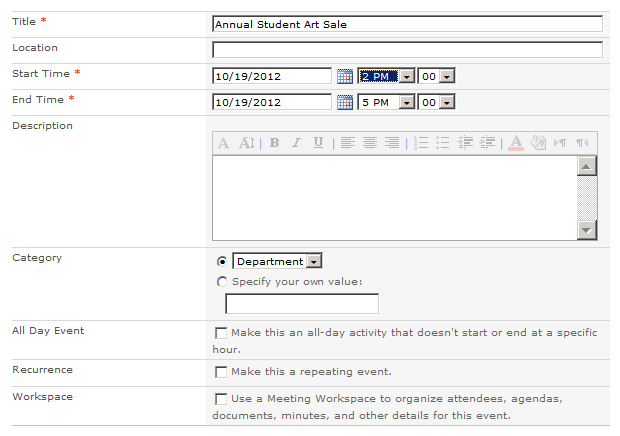
- Leave the following options blank if it is a one-time event with a start and end time

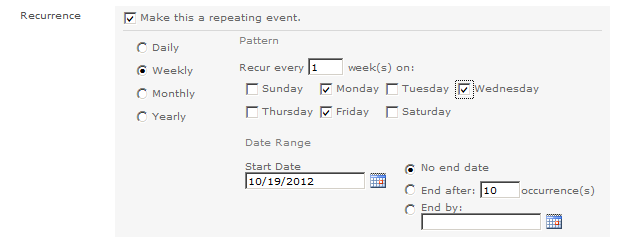
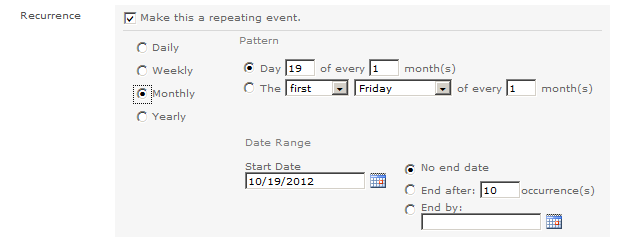
- If it is a repeating event, check Recurrence option "Make this a repeating event"
- Select a recurrence option and specify a pattern
Modifying Category list
- Open calendar
- Select Calendar tab from the ribbon
- Select List Settings
- Scroll down to Columns
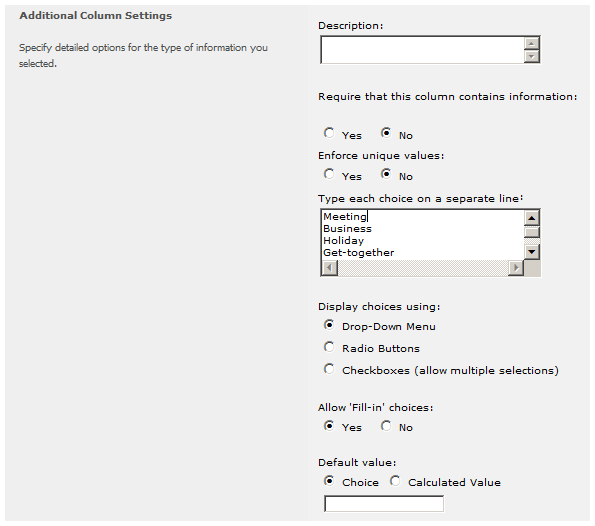
- Click on Category link under Columns header
In Change Column page, modify the category list under Additional Column Settings (edit/remove category, or add more category by typing each choice on a separate line)
Calendar views
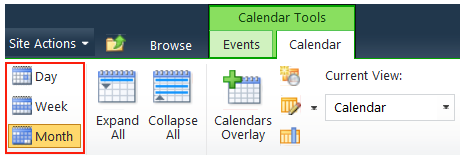
Switching views using controls on ribbon:
- Select Calendar under Calendar Tools tab
- Month is the default view
Switch calendar to different views: Day, Week and Month
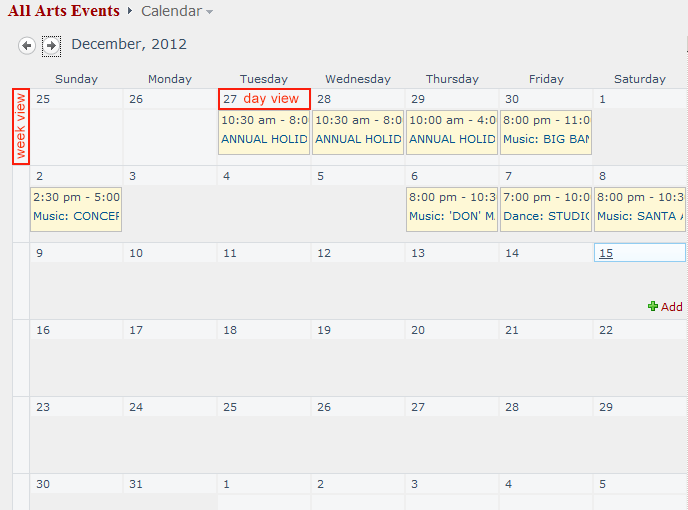
Switching views on a calendar list page:
- Day view: click on the date number
- Week view : click on the left side bar of each week
- Refresh the page to go back to the default Month view
Aggregating multiple SharePoint calendars into a single view
Calendar overlay is a feature in SharePoint that we can use to aggregate information from multiple sources into calendar view. You can add up to 10 overlays to an existing calendar view. Please note that if you connect the calendar to Outlook to synchronize the events, it will only synchronize items from main view and not from the overlays.
- Create a master calendar, e.g. FPA Events
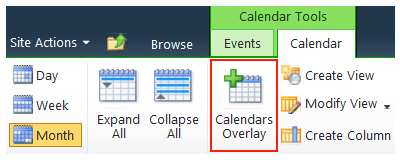
- Open the master calendar, select the Events tab under Calendar Tools and click on Calendars Overlay
- Click on New Calendar to add a calendar to the view

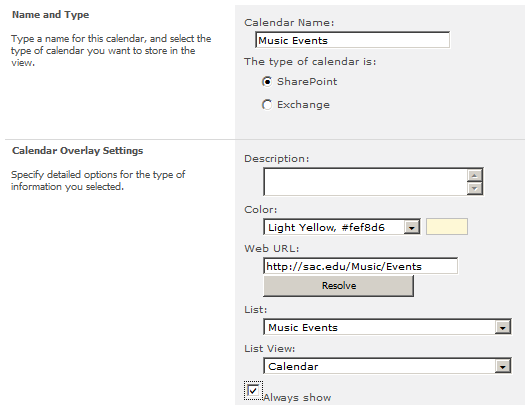
- Provide information about the calendar you want to add.
- Enter the correct calendar name
- Select a background color for this calendar to display on the master calendar
- Web URL: Enter the website address where the calendar is located
- Click on the Resolve button to populate the List and List view
- Select the right calendar from the dropdown if there are more than one in that website
Displaying a calendar on a web page
A calendar can be displayed on a web page using Web Part.
- Open the web page in editing mode
- Place the cursor in the page content area
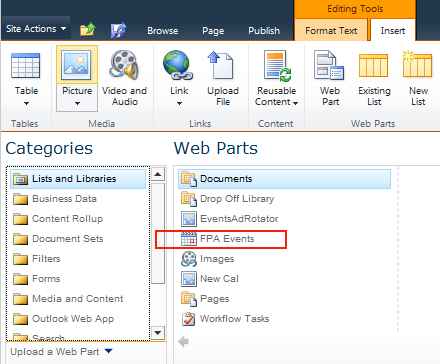
- Select Insert > Web Part (or Insert > Existing List)
- Select the existing calendar list (e.g. FPA Events) under Web Parts column
The overlaid calendars are not populated on the master calendar automatically after it has been inserted to the web page.
To display overlaid calendars in Web Part:
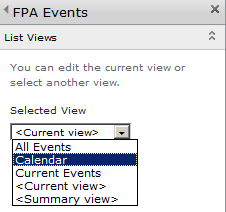
- Select Edit Web Part to open the Web Part Editor.
- Under Selected View, select Calendar from the dropdown list
- Under Appearance, select Chrome Type: None
- Click OK