Each web site created under a parent site should inherit the parent site permissions.
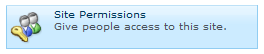
Under Site Actions, select SitePermissions
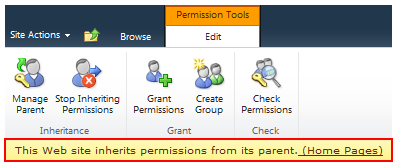
The status bar shows "This web site inherits permissions from its parents".
Permitted users inherited from parent site:
A website is maintained by its own web owners and contributors. Web owners and contributors of a website only have access permission to their own website and subsites created under their site. They cannot access another website if they are not added to that site permissions.
Note: Only owners of the website with Full Control can manage the site permissions.
Creating unique permissions for a subsite
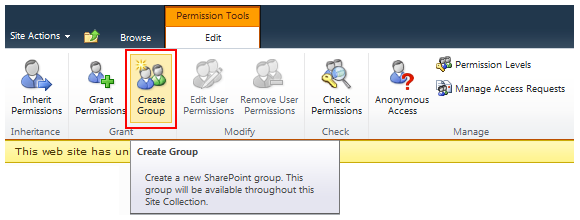
When a child site needs its unique permissions, it should stop inheriting permissions from its parent. In Site Permissions page, click on "Stop Inheriting Permissions" link on the ribbon.

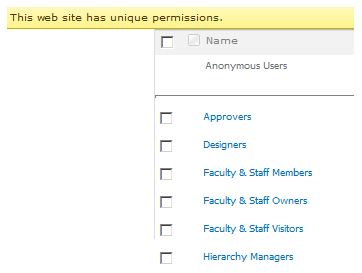
A message is returned, saying this site now has unique permissions and changes made to the parent site will no longer affect it.

Click OK
Permission inheritance has been stopped, indicated by a checkbox appearing in front of each group name.
Now you can edit the site permission for each user or group, or add new ones.
Creating a new permission group:
To create a permission group for a specific website:
- Open that website
- From Site Actions, select Site Permissions
- Click on "Stop Inheriting Permissions" link on the ribbon
- Click on Create Group
In Create Group page, enter:
- Group name
Naming convention: SiteName Permission
For example: PayRoll Owners, Research Contributors
Group name should be unique. You will get an error if you enter a group name that already exists.
- Description (optional)
- Group owner - If you create the group, your username is automatically populated in the Group Owner field, but you can change it to another username or another group name. Click the Check Names icon to verify it.
- Group Settings (keep the default: Group Members; Group Owner)
- Membership Requests (keep the default: No to both requests)
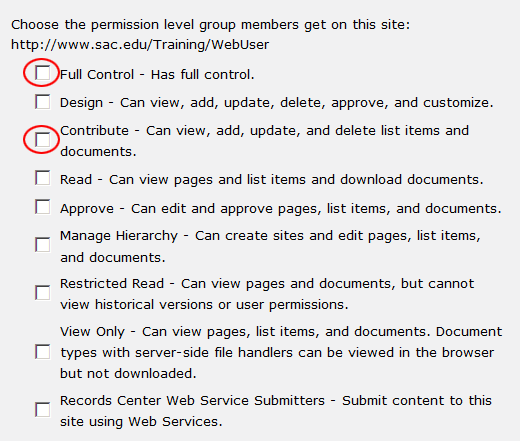
- Give Group Permission to this Site
- Check Full Control for site owners group, Contribute for contributors group
Note: When a site has contributors, the content approval workflow for that site should be enabled. Site contributors can edit web pages, create new pages but cannot publish them. Website owners need to approve the page and published it.
- When you open a specific website and create a new permission group, but you don’t check any check box to select a permission level, the newly created group has no access to this specific website. However, you can give it access to this website later (see Granting Permissions).
In order to give a group access to a site where it is created, make sure you check a check box to select a permission level before clicking on Create.
- Note: Groups are not "owned" by any specific site. No matter where you create permission groups, they belong to the entire Web site. You can add an existing permission group to as many websites as needed.
After creating a new permission group, open Site Permissions page from the Site Actions menu. You will see the newly created permission group appear on the list.
Adding Users to a permission group
Users of a group can access any site the group is added and inherit the same permission assigned to that group (Full Control, Contribute...)
Right after you click on Create, the new group page opens and it is ready for adding users.
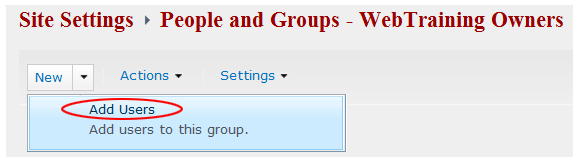
- From the Site Actions menu, select Site Permissions and double click on the group name to open the group page.
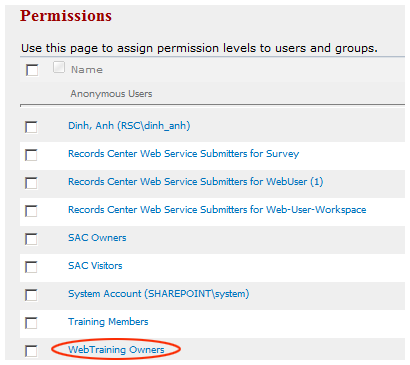
For example: WebTraining Owners with Full Control permission
- Select Add Users from the New menu
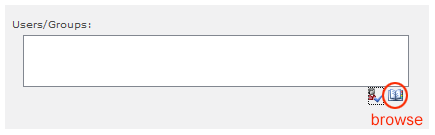
- Enter one username at a time and click on the check name icon to validate it.
Sending welcome email to the new users is optional.

New users added to this group will inherit its Full Control permission to this specific site.
- You can also find users by clicking on the browse icon
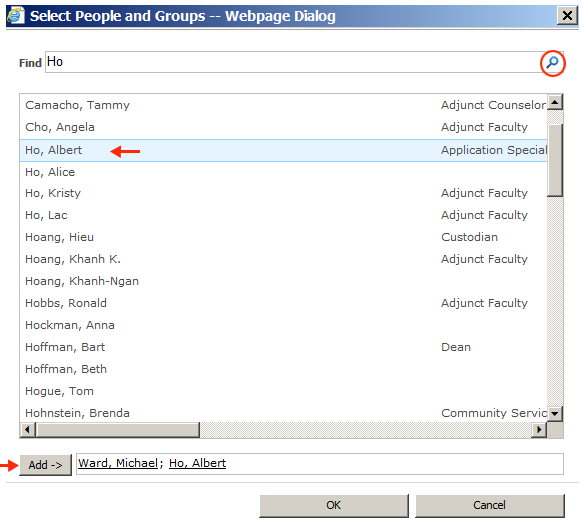
Enter a search word, click on the search icon, select a correct username, and click Add->
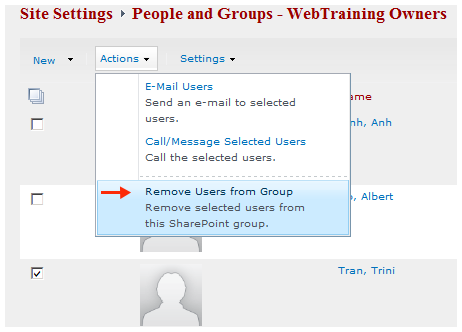
- To remove a user from a group:
- Click on a check box to select a user
- Select "Remove Users from Groups" from the Actions menu
Granting permissions to an existing group or a user
A site owner can grant editing permissions to a user or an existing group and assign a permission level for each.
- From Site Actions menu, select Site Permissions
- In Site Permissions page, click on Grant Permissions link on the ribbon

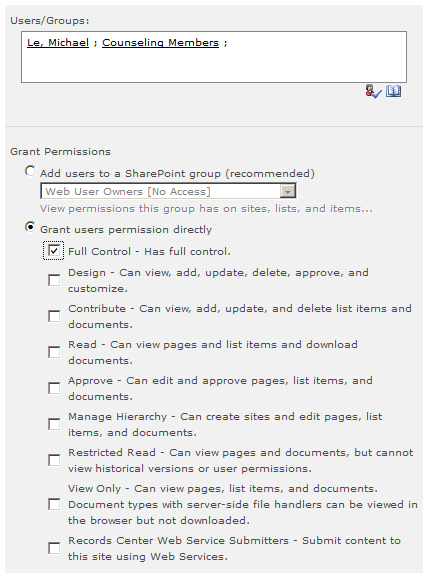
- Enter the group name or username to Users/Groups field and click check name to validate it
- Select "Grant users permissions directly"
- Check a permission level
- Sending welcome email (optional)
- Click OK
The newly added group or user(s) now appear in the Site Permissions page. An existing group, or user, can be granted permissions to as many websites as needed.
Edit / Removing Permissions
Web owner can edit or remove user permissions.
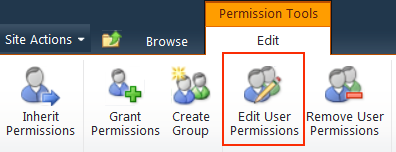
- To edit permissions: In Site Permissions page, select a username or group name, click on Edit User Permissions
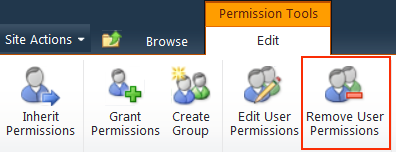
- To remove permissions: In Site Permissions page, select a username or group name, click on Remove User Permissions
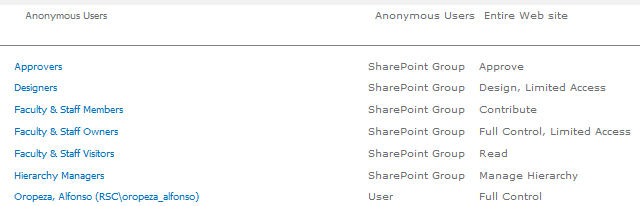
Anonymous Access
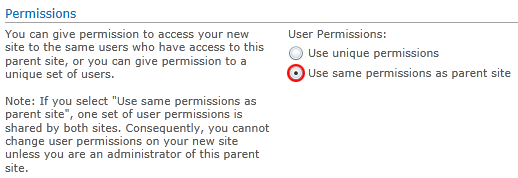
Anomynous access has been enabled by default. When you create a new site, it is recommended to select "Use same permissions as parent site". The newly created site should inherit anonymous access as well as all permission groups from its parent.
In Site Permissions page, Anonymous Users' permission is listed on top of other permitted users' groups.
You can make a subsite internal by disabling Anonymous Access for that site.
To disable/enable Anonymous Access to a subsite, that specific site should have unique permissions.
- From Site Actions menu, select Site Permissions
- If this site still inherit parent permissions, click on Stop Inheriting Parent Permissions
- The Anonymous Access link only appears when the site has unique permissions

- Click on Anonymous Access link
- Select "Nothing" to disable it
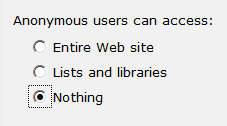
- You can enable Anonymous Access later by selecting "Entire Web site"